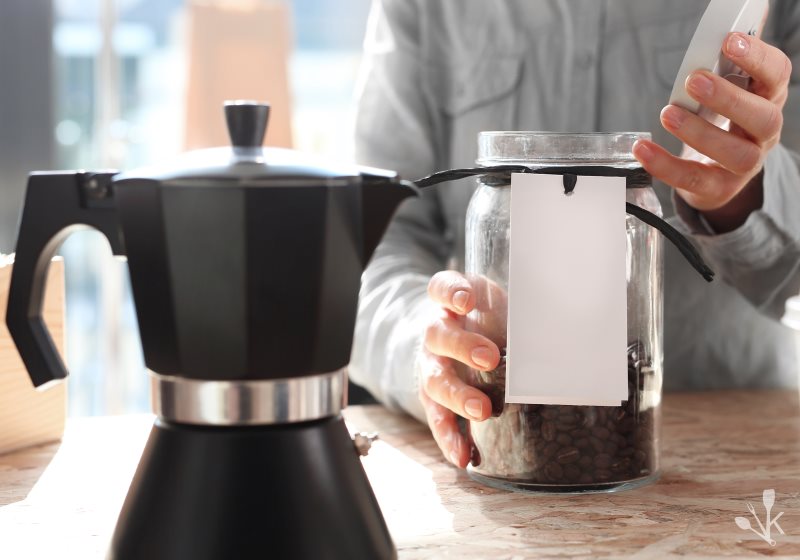
In this day and age of electric drip coffee makers and 1 cup coffee makers, the old-fashioned stovetop percolator seems to have fallen by the wayside.
This is a shame because percolated coffee made right is quite excellent and it’s easy to prepare.
When you make coffee using an old-fashioned percolator you can save a great deal of money and do the environment a big favor.
In this article, we will present some good reasons why perking your coffee the old-fashioned way is a great idea. We will also present some clear and concise instructions about how to make coffee in a percolator to create fresh perked coffee.
12 Simple Steps To Make Coffee With Your Stovetop Percolator
- Be sure to wash all components of your percolator before your initial use.
- Set the stand and stem assembly into the pot. You will notice that there is a spring located about two thirds of the way up on the stem.
- Pour fresh, pure filtered water up to the base of the spring. The grounds basket will rest on this spring. It should be slightly above the water level.
- Measure coffee into the grounds basket. One tablespoon per cup is the right amount.
- Place the grounds basket on the stem.
- Put the cover of the grounds basket firmly in place.
- Be sure that the glass bubble is secured in the center of the lid.
- Place the lid securely on the pot.
- Place the pot on a cold burner.
- Heat coffee gradually until it begins perking.
- Perk for 7 to 10 minutes (depending on how strong you want your coffee) and remove from heat.
- Allow it to sit for a couple of minutes to let any loose grounds sink to the bottom.
Related | Best Coffee Percolators
What Does Percolate Mean? (Perking)
When the coffee starts to “perk” you will see bubbling inside the glass dome area of your coffee percolator. A good pace for perking is bubbling every 2-3 seconds.
How Long To Percolate Coffee?
The actual perking of your coffee will vary depending upon what kind of stovetop you have. If you have a gas burner, you will use a medium flame until your coffee starts to perk and then you will turn it down to low wait for 7 to 10 minutes and turn it off.
If you have an electric burner it’s a little bit easier. You can set the coffee pot on a cold burner and turn it all the way to high. When the coffee starts to perk, turn off the burner.
Let it perk until it stops. This should take 7 to 10 minutes if you have a solid cast-iron burner. Time may vary a bit if you have a coil burner.
This is the simplest and easiest way to time and prepare coffee with a stovetop percolator. If you have a gas stove it is almost worth it to purchase an electric hot plate for the express purpose of perking your coffee.
Another advantage of having a dedicated hot plate for perking coffee is that it frees up your stove burners.
If you are perking coffee over a campfire, don’t put the pot over the flame. Instead, put a flat rock or a couple of bricks at the edge of the fire where they will get good and hot. Put the pot on the rock or bricks and keep a close eye on it.
When it begins perking, time it for 7 to 10 minutes and then remove it from the hot surface. Use a potholder!
Why Use A Stovetop Percolator?
A high quality stainless steel percolator is an investment in your coffee drinking pleasure.
Unlike electric drip coffee makers, one-cup coffee makers and even electric percolators, a stovetop percolator is forever.
With just a small amount of maintenance, a sturdy, simple stainless steel percolator will last you a lifetime and more.
Save trees and money! You don’t have to buy filters for a coffee percolator. The coffee grounds basket acts as a filter and all you need to do is empty it and rinse it out after each use.
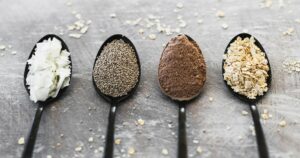
Buy coffee in bulk! You can save a fortune in coffee costs because you can purchase coarse ground coffee or beans that you can grind coarsely yourself in bulk at tremendous savings when compared with disposable options such as K-Cups.
Make coffee almost anywhere! With a stovetop percolator, you can make coffee on a gas or electric stovetop or even on a campfire or grill. This gives you tremendous flexibility and keeps you independent in the event of a power outage!
It’s easy to see that investing in a coffee maker that will last forever and never need any filters or disposable cups is good for both the environment and your pocketbook.
Add to that the savings you will enjoy by being able to purchase less expensive coffee in bulk and you literally stand to save a small fortune in your lifetime.
Isn’t Percolated Coffee Bitter?
If you don’t know what you’re doing, you can certainly make a very bitter cup of coffee using a stovetop percolator.
On the other hand, with the right instructions, a little practice and a little finesse you can make some of the best and most delicious full-bodied coffee you’ve ever tasted. Knowing how to percolate coffee is a skill worth having.
Coffee Percolator Parts
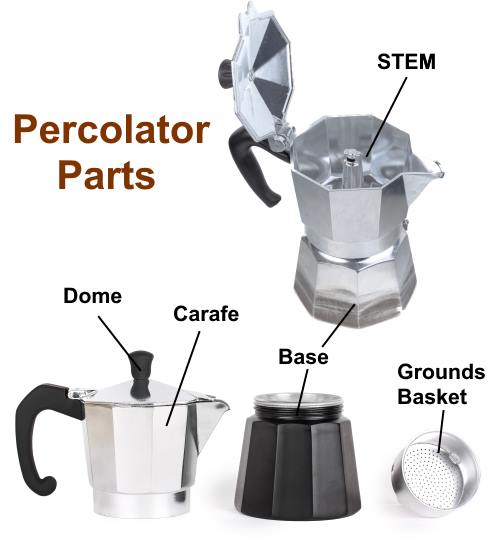
To begin with, you will need to have a sturdy, good quality percolator.
Be sure to purchase a percolator that is made entirely of stainless steel components. Avoid using an aluminum pot or pot that has aluminum components because the quality of your coffee will suffer and also your health may suffer from aluminum molecules leached into your coffee.
Stainless steel is a stronger and smarter choice.
If you are only going to use your percolator on your stovetop, it’s best if the handle is made of heat resistant plastic. If you do plan to take your percolator camping, it’s best to find one that has a stainless steel handle.
Remember that a metal handle will become very hot when you prepare your coffee, so always use a potholder!
When you purchase your stainless steel stovetop percolator, be sure to check the bubble in the top of the lid. Some percolators come with a plastic bubble, and this is not a good idea.
The plastic will not stand up to daily use, and having plastic leached into your coffee negatively impacts the flavor and can be a threat to your health.
If the percolator you purchase has a plastic bubble, spend five dollars more to buy a glass bubble replacement immediately.
The construction of a stovetop percolator is pretty simple. You have your pot, the stand and stem, the grounds basket and its cover, the lid and the glass bubble.
Your pot should come with instructions, but rest assured assembly is quick and easy and self-explanatory.
Enjoying Your Coffee
Be safe! You may run across instructions that tell you to remove the grounds basket immediately after perking to prevent having grounds end up in your coffee. This unsafe, and it is not necessary.
If you have measured your coffee into the grounds basket before putting the basket in place, and if you have made certain that the grounds basket lid is secure, you are unlikely to find grounds in your coffee.
If you are extremely sensitive to grounds in your coffee, invest a couple of dollars in a very fine mesh strainer to hold above your cup when you pour.
This is far safer than taking the scalding hot lid off your scalding hot coffee pot and removing the scalding hot grounds basket!
You can have one-cup convenience and save money! While you can make one or two cups of coffee in a 4 to 6 cup percolator, for convenience sake you might consider making a whole pot and then decanting what you don’t drink immediately into a glass container to keep in your refrigerator.
Heat this by the cup in your microwave as a convenient and thrifty way to enjoy a single cup of coffee.
Keeping Your Stovetop Percolator Clean
Taking care of your stovetop percolator is easy. When it has cooled down completely, tip the grounds into your compost bin and wash and rinse the pot and all its components thoroughly.
Set the pot and all its parts in your dish rack to air dry.
About once a month you should give your percolator a thorough cleaning by putting a few tablespoons of baking soda in the grounds basket and perking it just as you would coffee grounds.
When the perk cycle is finished, let the pot sit until it is completely cool and then wash all the components thoroughly.
Timing Is Everything!
A stovetop percolator is such a thrifty and practical solution to coffee making that it’s a little bit hard to understand why this handy device has fallen somewhat out of favor.
Perhaps people think it’s too tricky or too much work, but it’s really all a matter of timing.
When you use a stovetop percolator to make your coffee, you do need to keep an eye on it and you do need to know how long it takes for it to just reach the boiling point (when it starts perking) on your stove.
You also need to know whether you like your coffee perked for seven minutes or ten minutes and time it accordingly.
Some may find all this timing a bit inconvenient first thing in the morning or after a meal, and that’s why timing in a larger sense is also important.
If you can get in the habit of setting up your coffee before you go to bed at night and you have an electric burner and a timer, morning coffee making can be very easy. Just turn it on, set your timer and come back and turn it off when the timer rings.
If you are planning on having coffee after dinner, set it up and have it ready to perk when you sit down to your meal.
Set your timer so that you won’t forget to turn it off when it has started to perk. Then you can enjoy fresh, perked coffee immediately after you finish your meal.
Learning to use a stovetop percolator does take a little practice, but once you’ve done it successfully a time or two, you won’t give it a second thought.
The pros of knowing how to make your own fresh, delicious coffee in a thrifty, environmentally friendly way far outweigh any small measure of inconvenience.


will somebody PLEASE just tell me how can I KNOW when the coffee is done if I can not see it perk becvause no glass top????? PLEASE???
Hi Rose!
It will take a bit of trial an error. In general, on the stove it should take about 5 minutes, an electric unit a few minutes longer.
When testing, make sure that you use the same exact amount of water, coffee, and temperature. Then the only thing you will need to adjust and test is the time.
Tara
Where can I purchase a glass dome?
Hi Vince,
Unfortunately, you’ll have to find a percolator that has one already.
The glass tops for stovetop percolators can be purchased online through Lehman’s Hardware, Walmart even has them on the website. Lots of hardware stores that carry older products have them available.
Thanks Judy!
I purchased an old Corning percolator (yes, I know about the recall, I’ll be careful, had one for years no issues). My question is about the grounds. I drank coffee as a kid out of these things, but I don’t remember the amount of grounds I get now. Admittedly, the first coffee I bought for it was a little finer grind than I expected, but there are a ton of grounds in there. Is there a way to minimize them, or some sort of additional filter I can get. Or, do I just need to get a coarser grind?
Thanks!!
Hi Scott,
Yes, regular or coarse grounds are best for those old percs’!
Do you know if the grounds are getting out before you perc or after? Sometimes they can fall in before. You can trying to moisten the basket before adding the grounds, it might help them and smaller grounds to stick in the basket. Of course you should always be very careful when removing the basket as this is another opportunity for them to fall in to your coffee.
Cheers,
Tara
Thanks, Tara
They are definitely dropping in during the perc, I’m very careful with the basket already in the coffee maker, and I even lifted it up after I had the grounds in, just to see if they were dropping in because of being so fine, and nothing there. I did try a little bit of a redneck fix….cut a paper towel to fit the bottom of the basket, but that didn’t really help either. I haven’t tried the wetting thing, I saw that this morning on here, so I’ll try that for tomorrow. Looks like it’s a trip to the store to get less finely ground coffee. 😉
Thank you very much for all the information , one thing is wrong , when you describe the percolator parts , we can see the picture of a pressure expresso coffee maker , not quite the same . But no big deal , I ave all of those coffee maker and perked coffee is one of my favorite . All my regards , J-L M .