Whetstones are the easiest, fastest and most effective way to sharpen knives. Don’t be intimidated if you haven’t used one before, the method is simple to learn and it’s nearly impossible for you to irreparably ruin your knife, even if you are just learning how to use your whetstone.
Maintaining a sharp knife is essential for the smooth operation of your kitchen, and if you’ve invested in some quality knives, you should also invest time into regularly sharpening and refining the blade.
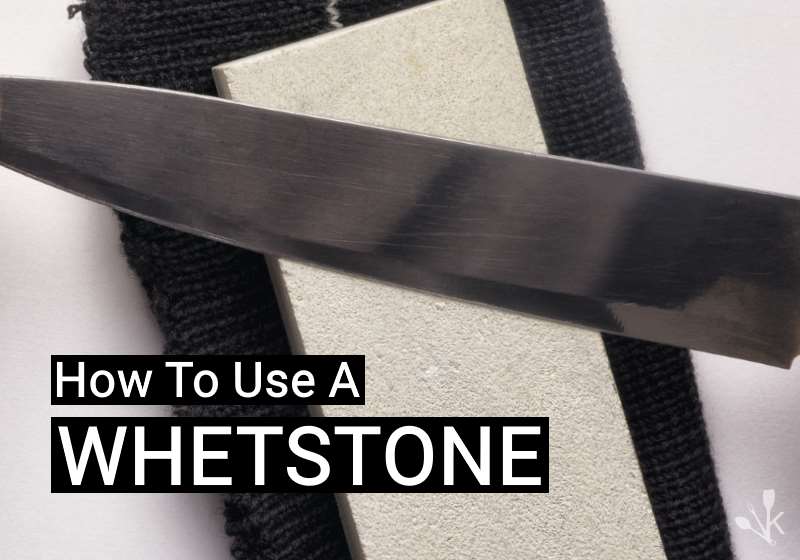
We’ve compiled all the information you need to know about using whetstones, so you can keep your kitchen knives razor sharp and make slicing and dicing a pleasure.
How To Sharpen A Knife With A Whetstone
Although it can be scary to sharpen your knife with a whetstone for the first time, it’s actually a very simple process. Once you’ve done it a few times, you’ll be sharpening all your knives like a pro.
Different knives often require different angles; manufacturers guidelines should give you an idea of the ideal angle for their style of knife.
As a general guide, Western knives should be sharpened at around 20-degrees, and Japanese knives around 15-degrees.
Here’s how to determine the angle at which to hold your knife while sharpening.
- Place the blade on the whetstone at a 90-degree angle – straight up and down.
- Slant the knife over so that it’s halfway between the 90-degree handle and lying flat – this is 45 degrees.
- Angle it down halfway again towards the countertop – this provides around a 22-degree angle.
- From here, slant it just a fraction more and you’ll be sitting at around the right angle.
If you’re a perfectionist who wants to ensure a precise angle, you can buy a blade guide to help you out.
You Will Need
- A container or bowl filled with water
- Cutting board or countertop
- Paper towels, sponge or kitchen towel.
- Whetstone/s
12 Steps – Using A Whetstone
- Submerge your whetstone/s in the water for five to ten minutes – until bubbles stop appearing on the surface.
- Dampen a paper towel, sponge, or kitchen towel and place it on the bench to create a non-slip surface. Double check that it is indeed stable before beginning the sharpening process.
- Place your whetstone on the damp towel – if using a double-sided whetstone, check that the coarser side is on top (the lower grit number).
- Take your knife in your dominant hand, and face the tip away from you – gently place the edge on the whetstone at 90-degrees and then find your ideal angle (as described above).
- Keep one hand on the handle and place the fingers of your other hand in the middle of the flat side of the blade – be careful to keep fingers away from the sharp (or soon-to-be-sharp) edge.
- Slide the blade down the whetstone away from you, applying gentle pressure and using a circular motion – try to keep the angle consistent throughout the movement. Make sure you sweep the entire length of the blade down the stone.
- Once you’ve finished the first sweep, lift the blade up, bring it back towards you and repeat – always move in the same direction, don’t drag the blade back and forth along the whetstone.
- Repeat the movement on the same side five to ten times.
- Check the sharpness by very carefully pressing your thumb across the blade – but don’t slide your skin along it. If you feel a slight pulling, this means it is sharp, whereas if it feels smooth – that indicates bluntness.
- Flip your knife over and repeat the process on the other side.
- Once your edge is suitably sharp, flip the whetstone over to the finer side (or take your higher grit whetstone and place it on the non-slip surface for use).
- Repeat the process 5-10 times for each side with the finer whetstone.
What Is A Whetstone?
A whetstone – also known as a water stone or sharpening stone – is a stone used to sharpen and refine the blade of a tool. Most commonly, whetstones are used to sharpen knives but can be used to hone anything from an ax to a pair of scissors.
There is a wide range of materials used to create whetstones, some are natural, others synthetically produced.
Synthetic whetstones generally perform better than natural whetstones, as they can be manufactured to have an even particle size throughout, therefore creating a more even, precise edge
Whetstones are the preferred method of sharpening – you have much more control over the process, and the stone doesn’t grind away too much of the blade – they are suitable for use on either Western or Japanese-style knives.
Available in a wide range of sizes, a 6-inch or 8-inch length is ideal for the average home chef. If you purchase a small whetstone, you may struggle to sharpen larger knives such as chef’s knives, but with a larger whetstone, you can sharpen even the smallest pocket knife.
Don’t try to sharpen ceramic knives with a whetstone – the blade is too brittle and will break.
Whetstone Grits
Whetstones come in a wide variety of grades or grits. The grit size refers to the abrasive quality of the stone. Some stones are more coarse and will remove a lot of steel from the blade, while finer grits are used to refine and finish an edge.
The higher the grit number, the higher the particle density and the smaller the particles are – resulting in a razor sharp finish.
Most synthetic whetstones will be double-sided, with a coarse side for repairing nicks and chips or sharpening a blunt blade, and a finer side for finishing off the job.
It’s possible to sharpen a blunt knife entirely using a finer grit, but it will take you much longer than starting off with a coarse grit and moving onto a finer one for finishing.
If you’re really fussy about the sharpness of your knives and have a wide range, you may want to invest in a number of different stones with varying grit sizes.
Bear in mind that higher grit numbers will give you a sharper knife, but this more refined edge will also dull more quickly.
What Grit Whetstone Do I Need?
- >1000 grit – Not recommended for beginners – these stones remove a lot of material from the blade! Useful for repairing severely chipped knives.
- 1000 grit – Best for a knife with some chips or nicks or to revitalize a knife that has become very dull. Don’t use this grit for maintenance.
- 2000 – 3000 grit – Not quite so abrasive – can be used more often to maintain a sharp edge.
- 4000 – 5000 grit – These are the finishing grits – used to refine an already sharpened blade. Most western-style knives shouldn’t need a higher grit than this.
- 6000 – 8000 grit – Provides a razor-sharp finish to your blade.
If the knife you want to sharpen is primarily used for cutting meat, stick to a maximum grit of around 4000-6000. Higher grits are great for creating a refined edge to slice through fruit and veggies but may cause your blade to bend when attempting to cut through stringy or tough meat.
How Long Do You Need To Soak A Whetstone?
Although the “whet” in whetstone refers to “whetting,” as in sharpening, these stones are best used when wet.
The water helps to keep any waste material created in the sharpening process from clogging up the stone and making it ineffective. If you try using a whetstone without liquid, it will quickly lose the ability to sharpen your knife.
Synthetic whetstones should be immersed in water for around five to ten minutes before use. Keep an eye on the air bubbles emanating from the stone – once they’ve stopped appearing, you’re good to go.
If using finer grit whetstones, you may not need to soak them, merely moistening the surface may be enough. Check the manufacturer’s instructions before use.