Need to know how to work a Keurig Carafe? In this guide you will learn how to brew a pot of coffee using Keurig K Carafe pods in our simple step by step Keurig carafe instructions.
Be aware that different Keurig models take different pods and you’ll need to purchase the right pod or refillable K-cup for your Keurig.
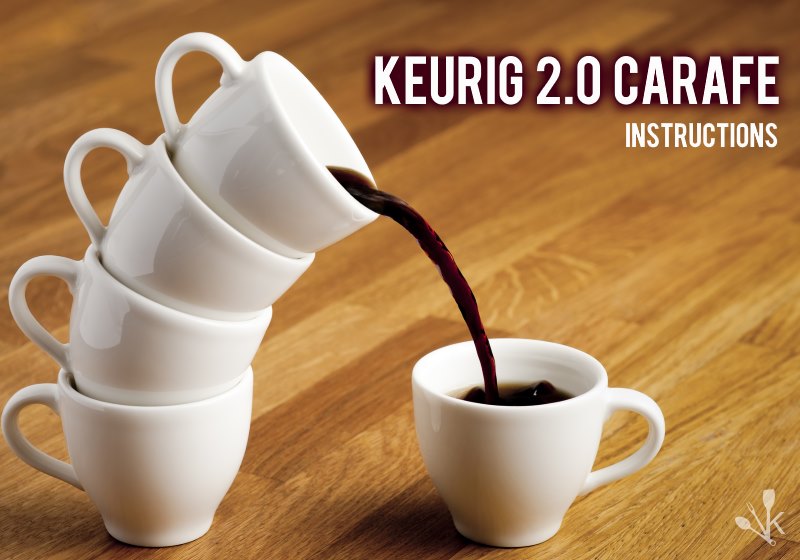
How To Use A Keurig Carafe
The official Keurig Carafe fits Keurig 2.0 coffee makers. However, there are aftermarket models that you can purchase that may be easier on your budget.
Keurig also offers reusable filters for single cup brewing with the Keurig 2.0 and recyclable Keurig Carafe Pods. If you aren’t keen on the coffee selections available, there are reusable filters that you can fill with your own coffee.
The following steps will help you brew a pot of coffee using any carafe.
To brew a carafe, you will need:
- A K-Carafe pod, which contains enough coffee to brew 4 cups into the carafe.
- Your Keurig 2.0 Carafe, which has a brew through lid and double thermal wall construction.
Keurig 2.0 Thermal Carafe | Editor Recommended

Top Features
- 4-Cup Capacity (32 oz. capacity)
- Double-wall stainless steel construction
Keurig Carafe Instructions:
- Make sure you have enough water in the reservoir to brew a full carafe. There should be a minimum and maximum level indicator on the reservoir to guide you.
- Some models will require you to remove the drip tray in order to fit the carafe in place. Ensure your carafe is empty and clean before doing so.
- Open the pod mechanism and place a new K-Carafe coffee pod or reusable filter inside. Make sure that it has a proper fit to avoid any accidents while brewing. Close the pod mechanism completely.
- Check your Keurig settings and set it to brew the carafe size. There are multiple sizes to choose from, so make sure you are using the correct pod and carafe size that fits your machine. For some machines, you can check the number on the lower tab of the pod and select the number on your screen.
- Adjust any brew strength settings, if applicable, and brew away.
- Wait for your machine to completely finish brewing and dripping before removing the carafe.
Never add anything other than water to your Keurig. In addition to the exterior reservoir, there’s an interior reservoir that allows for rapid heating of the water.
Should you add a different liquid, such as milk, the milk will be trapped inside this additional reservoir. You may dilute it, but you’ll never be fully rid of it without taking the machine apart.
Nothing worse than brewing your next cup with scorched and spoiled milk! Our Keurig troubleshooting guide can assist just in case you have an accident.
Keurig Carafe Pods
The needle in your Keurig lever is extremely fine and transmits hot water into the pod with great efficiency. Obviously, this is the portion of the coffeemaker that pokes a hole in the top of your coffee pod. As a general rule, cleaning the Keurig will clean this needle.
Related | How To Descale A Keurig 2.0
However, some Keurig pods and aftermarket varieties contain a lot of sugar, and this can gum up the works.
If you notice that the machine isn’t puncturing pods, or if the water is intermittent or not transferring well, check out the needle mechanism and make sure it isn’t blocked by sugar.
As ever, there are multiple hacks available on the internet to get around Keurig carafe and pod limitations. It’s critically important to remember that coffee is a combination of very hot water and grounds, so any modifications to the original equipment may result in burns.
In addition, the Keurig mechanism pairs hot water with sharp needles, increasing your risk of injury.
Any hacking or modifications can destroy the pot and void your warranty. For the price of a new machine, you can buy quite a few Carafe Pods.
Keurig Carafe Reusable Filter
The Keurig pod holder is the spot where your K-cup pods sit as they are punctured and as your hot beverage is brewed.
If you’d like to:
- Lessen the environmental impact caused by plastic pods
- Select your own coffee
- Save money
You can use a My K-Cup Coffee Filter rather than purchasing pods. Coffee experts with the Coffee Detective demonstrate how to prepare your Keurig for a K-Cup reusable filter.
You do have to remove a portion of your Keurig to insert the reusable filter, so review the video until you’re comfortable taking parts out of the pod holder mechanism.
MaxBrew 24K Gold Reusable K-Carafe Filter | Editor Recommended
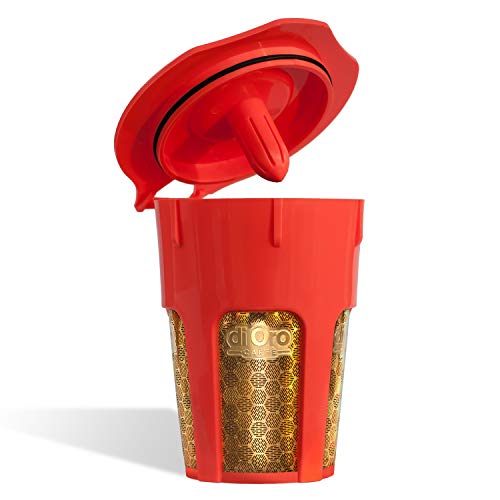
Top Features
- 24K gold plated honeycomb
- For use in Keurig 2.0 machines
- BPA and lead free
- Dishwasher safe
There are also reusable K-Cups from other manufacturers, some offer paper filters and some gold, so shelf life will vary.
The Keurig carafe reusable filter is a gold filter and is easy to reuse.
- Once you’ve brewed your coffee, open the Keurig and allow the filter to cool.
- Remove the K-Cup Coffee Filter from the top of your coffeemaker and rinse the container and the filter well.
As long as you’re not using an espresso grind, this filter should be very easy to clean.
Which Keurig Thermal Carafe Should I Purchase?
The official Keurig 2.0 carafe is a great purchase if you need to brew multiple cups of coffee, or if you head into the world each day with a monster travel mug.
However, if you’re only brewing for one or two people, the Keurig 2.0 may be more of a hindrance than a help. You’ll be limited to Keurig carafe pods.
If you’ve developed a taste for donut shop coffee blends or a particular hot chocolate, you may be out of luck with a 2.0.
However, there are benefits to investing in a 2.0 The Keurig thermal carafe. One of the biggest drawbacks to Keurig coffee is that your coffee sits open to the elements as it brews.
While the required temperature may be accurate, you may find that your coffee doesn’t hold its heat as long as you hoped. Brewing directly into a carafe will reduce this heat loss.
Final Thoughts
For a small household, a regular Keurig might be the best choice. You can make your own coffee pods or purchase aftermarket options for a wide variety of flavors.
Related | Best Keurig Coffee Flavors
If you need more coffee for a bigger group, a Keurig 2.0 coffee maker might be the way to go.
You’ll need to be prepared to purchase the right carafe for your setup and double check that you’ve got the right pods too.


I have a question. I have just bought the Keurig HOT K200 PLUS in Canada. No problem using the K Cup pods. The box says I have the option to brew a mug. The website tells me that the K Mug pods are not available any longer. Which is unfortunate. I cannot get the control pad to show my the KCarafe setting. If I buy the KCarafe pods will the controls appear automatically to brew a carafe? Anybody know? Thanks.
The screen for the carafe brew cycle does not appear unless a K carafe is inserted. It’s a great feature. But, just using a carafe pod will not trigger the carafe cycle if that’s what you’re asking. Hope this helps.
I have the 2.0 Kerrigan coffee maker and I also have the filter to make a carafe size from 2-5 cups of coffee. I don’t use it often unless I have company to make a carafe of coffee. This morning i wanted to make a carafe of coffee in the amount of 4-5 cups, everything was fine until I wanted to make the strength a #4 it would not let me, only a #1 strength. Kept coming up this carafe is not compatible, I never had trouble before and took the reusable filter out thinking I didn’t have it inserted correctly and tried 4 times and still would not work.HELP!!!!