Steaming and frothing milk are tasks that start out the same but have different steps to get the milk just right.
They both require the heating of the milk for the best result, but steaming introduces less air.
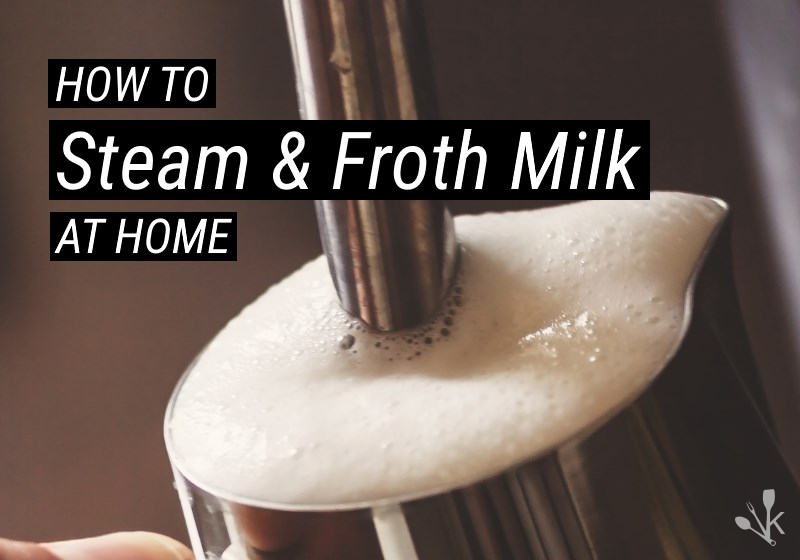
In this guide you will learn how to steam milk and how to froth milk at home for coffee, espresso, and lattes.
What You Will Need
For Frothing Milk:
- Milk frother
- Cold Milk
- Container to froth in, preferably stainless steel
For Steaming Milk:
- Milk steamer (wand or pitcher)
- Cold Milk
- A container suitable for steaming milk
See our best milk frother guide to help you choose a model that is best for making latte at home.

For both steaming and frothing, you’ll need a milk container. Generally, a stainless steel pitcher is used for this purpose.
Because you’ll be handling this container around a steam wand, be sure to find one with a handle that allows space for your fingers to fit without sitting against the metal body of the pitcher.
To properly steam milk, you’ll need a steaming wand as found on many of the best espresso machines or a steaming pitcher.
This wand will need regular purging or bleeding and should be cleaned regularly to avoid milk solids building up and spoiling inside the steaming tip.
How To Steam Milk
You’ll need a steaming wand (generally available on your espresso maker), and it’s a good idea to have a separate milk pitcher with a handle.
Traditionally this pitcher is metal, so make sure the handle gives plenty of clearance for your fingers.
Once the steam hits it, the milk and pitcher will warm up quickly.
When you steam milk, it will not only froth but sweeter. Keep this in mind when preparing your coffee drink. If you enjoy special syrups in your coffee, use a light touch to start as your steamed milk will add a level of sweetness.
Too much syrup and your drink stops being coffee and becomes a candy bar in a cup.
Milk Steaming Instructions
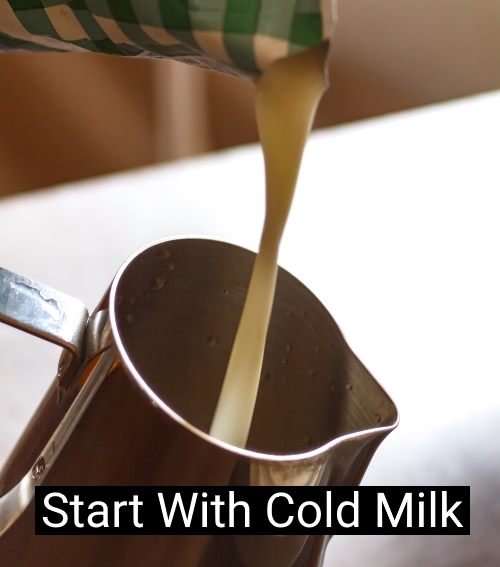
- You’ll want to start with cold whole milk. Use a stainless steel pitcher to hold your milk, and never fill it more than half full so you have room for froth.
- Bleed your steam wand to make sure it’s clean, ready to use and has no cool water trapped in the wand tube.
- Once the steam line is purged, place just the tip of the wand under the surface of the milk and release the steam so you can introduce a bit of air to the milk.
- Once the volume has risen, lift the pitcher so that the steam is just circulating and warming the milk.
- Take care not to introduce more air once the milk is warm. This additional air can raise the temperature of the milk over 160 degrees Fahrenheit / 71 degrees Celsius, or it may scorch and turn from sweet to bitter.
- Bring the milk up to temperature.
- Tap and swirl your container gently to polish the steamed milk.
- Pour into your coffee beverage.
How To Froth Milk
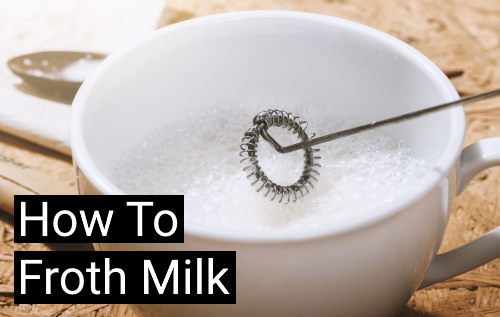
Both frothing and steaming milk require heat and agitation. A steam wand is the easiest way to add both.
However, the goal with frothed milk is volume, so using an additional source of agitation is certainly recommended.
When getting ready to froth, consider the following conditions:
- Start with a cold milk product
- Use low-fat dairy products for best volume
- If using non-dairy milk, try almond or soy
- Do not overheat the milk!
Milk frothers come in all shapes and sizes, from tiny whisks that only add volume to separate electric pitchers that both heat and agitate your milk.
Whatever product you opt to use, be prepared to clean this item thoroughly after every time you use it.
Milk proteins, when burnt, are stubborn and will cling to any and all hot surfaces, rendering your tool smelly and unusable.
It’s also not a good idea to use an automatic frothing pitcher and leave it unattended. Once the volume starts to expand, it may overflow if left alone on a counter, leaving you without your favorite coffee beverage and with a milky mess to wipe up.
Fat holds bubbles pretty well. It’s how butter and whipped cream work: the fat forms a kind of lattice that holds bubbles of air or water.
These bubbles give the fat structure:
- In whipped cream, they’re soft and airy and make gentle (but still fairly stiff) foam.
- In butter, they create a solid block of delicious fatty goodness.
Frothed milk works on a similar principle except instead of a structure of fats holding the air bubbles it is a web of proteins. Proteins in milk have an end that likes water and an end that tries to avoid water.
If you introduce air bubbles into the milk, the proteins encircle them and try to stick their water-phobic end in the bubble. The ring they form will be tight enough to prevent the air bubbles from leaving.
Heating the milk changes the way the proteins behave. The hotter your milk gets, the more freely the proteins swim around and the more easily it holds big bubbles.
- If you want small bubbles, add air before heating your milk.
- If you want big bubbles, heat your milk first.
You generally don’t want your milk to get above about 165 degrees Fahrenheit because it will start to taste a bit “eggy” as the proteins unravel.
Here is a great video on 6 milk frothing mistakes:
Inventive coffee fans have developed a method of creating froth in their microwave. Food experts have developed a frothing method that includes a jar, a tight-fitting lid and about a minute of microwave time.
While this process is ingenious, it’s not recommended that you do this without at least one cup of coffee already in your tank. Drink the first one flat if you must.
The risk of spraying yourself (and your kitchen) with hot milk, or of forgetting and placing a metal lid in your microwave, is too great.
Best Milk For Frothing
You can froth:
- Non-fat milk
- Skim milk
- Whole milk
- Soy and almond milk
The way your milk froths will depend on both the type of proteins in it and the amount of fat. The ends of the proteins in your milk are also attracted to fat particles.
Less fat means that the proteins spend more of their time protecting bubbles. That means that lower fat milk produces a drier foam. That isn’t better or worse; it’s just a question of taste.
Dry foam is really cool when it comes to introducing layers to a drink, but when it comes to mixing, you might prefer creamy high fat foam that blends with your beverage more easily.
Can You Froth Almond Milk?
Yes! Almond milk can be frothed with a bit of time and plenty of agitation.
The following video demonstrates how cold, unsweetened almond milk will heat and rise to the occasion of your morning cup of coffee. Don’t walk away from your frother!
Soy and almond milk usually froths fairly well, but you’ll get different results with different brands. Play with temperature, time and brand to get optimal results. Other milk substitutes may not yield great results.
How To Froth Almond Milk
You can froth almond milk as you froth cow’s milk. Take care not to use sweetened milk, or to add any extra sweetener or protein to the almond milk before adding heat.
In comparing just how horrible burned milk can taste, almond milk is pretty much at the top of the list, and adding sugar will only catalyze the burning process.
Non-dairy milk products froth and steam with varying degrees of success. Soy milk generally froths well, but you may find that it curdles easily, making a cup of coffee with chunks of tofu in it.
Finally, experts with Seattle Coffee Gear put together a steaming test to help determine the best non-dairy steaming alternatives. Their result? While hemp milk froths nicely, rice milk steams but generally won’t aerate.
How To Froth Milk Without A Frother
If you’ve got a stove and a mixer, you can froth milk on your stove top.
Final Thoughts
The fat and protein content of the milk, whether cow’s milk or non-dairy product, will impact the quality of the final flavor.
For steamed milk, try to use milk with higher fat content. Frothed milk is easier to create using a lower fat content product.